![]()
SQL Subfile Wizard
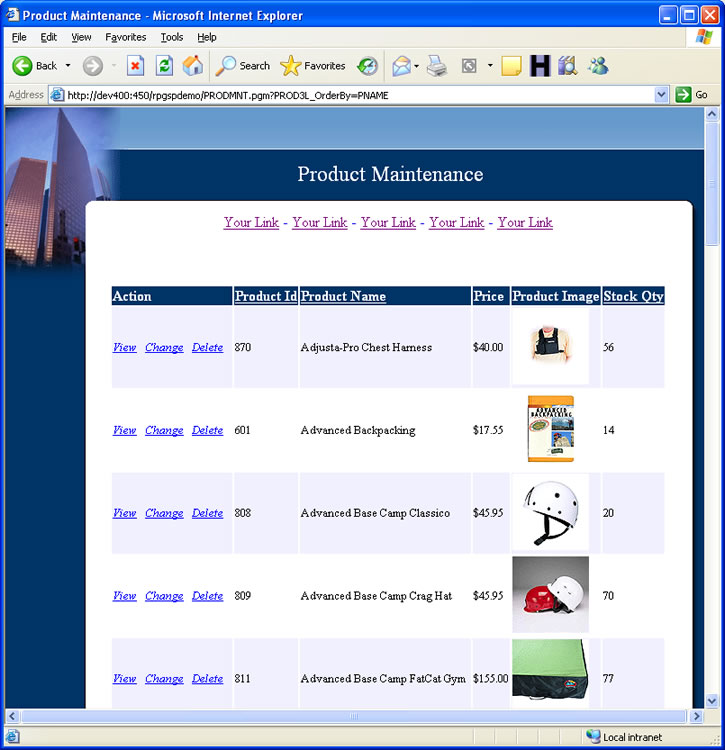
The SQL Subfile Wizard creates an application that presents a listing of records. The application can serve as a simple listing or as a full file maintenance application with view, change, delete, and add record capabilities. This wizard generates SQL statements to produce a subfile with sortable columns. Here is an SQL subfile example:
You can start the
SQL Subfile Wizard from the Wizards Menu. The first wizard page prompts you for miscellaneous
document attributes.
Create New Document (Yes/No)
By default, the subfile wizard creates a new subfile page and places the generated code into it.
If you would like to integrate the generated subfile into an existing page, click on the No radio button. This option will insert the new content into the active document. The content will be placed at the current insertion point of the active document.
Document Name
Indicates the name of the new subfile page to create. This name will be used when you save the generated source file. It will also be used to name the created program object during compilation. The name is limited to 10 characters or less because iSeries object names must not exceed 10 characters.
Free-Format RPG
When this box is checked, all RPG code generated by the wizard will use free-format RPG. If you would like the wizard to generate fixed-format Calculation Specifications, leave this box unchecked.
Title
Indicates the document title and the document heading to generate. Theme templates control where and how the title field is used by utilizing the !title! placeholder.
Theme Selection and Preview
A Theme is a set of template files that describe the look of a generated application. Template files use standard html in combination with special placeholders. In the subfile wizard, you can preview and select a theme by clicking on the button labeled with three dots next to the theme text field. When the theme selection window pops up, select the appropriate theme, and click Ok. A preview of the theme will be shown in the preview window. You can zoom in and out using the + and - buttons.
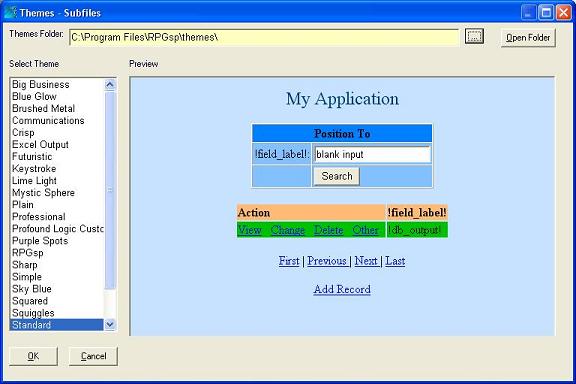
You can change existing themes or create your own by selecting the Wizards -> Themes pull-down menu option.
File Name
Type in or select the name of a physical or a logical file. This file will be used to retrieve the data records from. If you plan to use multiple files, select the primary file first. If you have retrieved the field definitions for this particular file before, the record format name and available fields will automatically be populated from the local database repository; otherwise, you must click the blue button to get the field list from the iSeries.
Library Name
The Library Name field is used for locating the specified file when the "Get Field List from iSeries" button is used. It is recommended that you leave this field blank, in which case the compile-time library list defined under Tools -> Options is used. To change the library list on the fly, click on *LIBL.
Related Files
Pressing this button will open the Add Related Files dialog, where you can specify one or more related database files to be used by your subfile application. If you have already added related files, the Related Files dialog will open, where you can change or remove files you have already added, or add more related files. After you have defined one or more related files, their fields will appear for selection in the Available Fields box. The SQL Subfile Wizard will expand the generated SQL statement based on the selected files and the relationships between them.
Available Fields / Selected Fields
The Available Fields box shows you the file fields you can select for your subfile. If no fields appear, click the blue button to get the field list from the iSeries. The box shows you the field name, the field description, the field length and type, and the key sequence for keyed fields.
The Selected Fields box shows the fields you have selected to display in your subfile. Generally, you should select only the most important fields for the subfile page. You you will be able to select more fields to put on the detailed view record page.
![]() Moves
a field or fields from the Available to the Selected Fields box. Prior to clicking
on this button, you should select one or more fields in the Available Fields box.
Moves
a field or fields from the Available to the Selected Fields box. Prior to clicking
on this button, you should select one or more fields in the Available Fields box.
![]() Moves all Available Fields to the Selected Fields box.
Moves all Available Fields to the Selected Fields box.
![]() Removes a field from the Selected Fields box.
Removes a field from the Selected Fields box.
![]() Removes all fields from the Selected Fields box.
Removes all fields from the Selected Fields box.
![]() Changes
the order of the selected fields by moving the chosen field up one position.
Changes
the order of the selected fields by moving the chosen field up one position.
![]() Changes
the order of the selected fields by moving the chosen field down one position.
Changes
the order of the selected fields by moving the chosen field down one position.
How the selected fields appear in the generated subfile is defined in the database
repository's Output HTML field property. A snippet
of HTML code is assigned to each field to determine how the field will appear (standard,
dynamic image, trimmed spaces, URL, multi-line text, etc.) Right-clicking on a field
name will allow you to open the Field Properties
dialog, where you can specify these properties.
Sortable Column Checkmarks
In the Selected Fields Box, each selected field has a checkbox by it. When checked, RPGsp will generate SQL statements to allow the subfile to be sorted in ascending or descending order based on the checked field by clicking a hyper-link in the field's column heading.
Alternate Row Color
Select this option if you want RPGsp to generate code that will alternate the background of each subfile row as the subfile is being loaded. The subfile theme template must support this feature by using the !rowcolor! placeholder.
Row Color 1
Specifies the color for the odd-numbered rows.
Row Color 1
Specifies the color for the even-numbered rows.
Row Color
When the Alternate Row Color checkbox is not selected, this field specifies the background color of all subfile rows. The subfile theme template must support this feature by using the !rowcolor! placeholder.
Add Search/Lookup Capability
This option, if selected, will automatically add a lookup box to your application based on the key of the file. For example, if your file is keyed by the Customer Number field, the generated application will allow users to position to any record in the subfile by typing in a Customer Number.
Load Page at a Time
This option determines if the application should load all of the file records onto the page at once or load only a certain number of records at a time. For the latter, the wizard generates first page, previous page, next page, and last page links, along with the RPG logic to keep track of the subfile's position.
Number of Records per Page
Determines the number of records to load into the subfile at once when Page at a Time is used.
Show Navigation Buttons Only if Necessary
When this checkbox is selected, the SQL subfile will only display a navigation button if that button is needed based on the position of the subfile. For example, if the last page of the subfile is already on the screen, the Last button or hyperlink will not be displayed.
Subfile Actions
You can attach actions to each record being loaded into the subfile. The following action types are available:
Actions must be supported by the subfile theme template. Certain themes, like the Excel Output theme, do not have actions.
Actions Labels
The action label is the text or link name that will appear on each record to represent the action. Action labels must be supported by the subfile theme template utilizing the appropriate placeholder. Some themes, like the Blue Glow theme, do not use action labels; instead special icons for view, change, and delete are used.
Action Smart Page Names
This is the name of the RPG Smart Page that will process the action. Each action is generally processed by a separate page. The name must not exceed 10 characters. Each action's RPG Smart Page name is automatically pre-filled with the name of the main subfile document plus a suffix; however, you can change it to anything.
Action URL's
The URL of each action is automatically built based on the action's RPG Smart Page name and the key fields of the file. You can make modifications to the automatically built URL if needed. Essentially, the URL encodes the key fields to pass to the action processing RPG smart page. The action processing page will, in turn, retrieve the key fields and use them to recover the record, on which it will perform the appropriate action. The file key is assumed to be unique. If the file key is not unique, you will have to make changes to the generated application to make it work properly.
Create Page Now
The subfile wizard is capable of generating the related action pages in addition to generating the main subfile page. Select one or more Create Page Now checkboxes to generate these pages. When you click Next, the wizard will ask you questions relevant to building these extra pages.
If you selected the Create Page Now checkbox for the view action, you will be prompted with the View Record Field Selection dialog.
Available Fields / Selected Fields
The Available Fields box shows you the file fields you can select for your View Record Details Page. The box shows you the field name, the field description, the field length and type, and the key sequence for keyed fields.
The Selected Fields box shows the fields you have selected to display in your View Record Details Page.
![]() Moves
a field or fields from the Available to the Selected Fields box. Prior to clicking
on this button, you should select one or more fields in the Available Fields box.
Moves
a field or fields from the Available to the Selected Fields box. Prior to clicking
on this button, you should select one or more fields in the Available Fields box.
![]() Moves all Available Fields to the Selected Fields box.
Moves all Available Fields to the Selected Fields box.
![]() Removes a field from the Selected Fields box.
Removes a field from the Selected Fields box.
![]() Removes all fields from the Selected Fields box.
Removes all fields from the Selected Fields box.
![]() Changes
the order of the selected fields by moving the chosen field up one position.
Changes
the order of the selected fields by moving the chosen field up one position.
![]() Changes
the order of the selected fields by moving the chosen field down one position.
Changes
the order of the selected fields by moving the chosen field down one position.
How the selected fields appear on the generated View Record Details Page is defined
in the database repository's Output HTML field
property. A snippet of HTML code is assigned to each field to determine how the field
will appear (standard, dynamic image, trimmed spaces, URL, multi-line text, etc.)
Right-clicking
on a field name will open the Field Properties
dialog, where you can specify these properties.
If you selected the Create Page Now checkbox for the change action, you will be prompted with the Change Record Field Selection dialog.
Available Fields / Selected Fields
The Available Fields box shows you the file fields you can select for your Change Record Details Page. The box shows you the field name, the field description, the field length and type, and the key sequence for keyed fields.
The Selected Fields box shows the fields you have selected to display in your Change Record Details Page.
![]() Moves
a field or fields from the Available to the Selected Fields box. Prior to clicking
on this button, you should select one or more fields in the Available Fields box.
Moves
a field or fields from the Available to the Selected Fields box. Prior to clicking
on this button, you should select one or more fields in the Available Fields box.
![]() Moves all Available Fields to the Selected Fields box.
Moves all Available Fields to the Selected Fields box.
![]() Removes a field from the Selected Fields box.
Removes a field from the Selected Fields box.
![]() Removes all fields from the Selected Fields box.
Removes all fields from the Selected Fields box.
![]() Changes
the order of the selected fields by moving the chosen field up one position.
Changes
the order of the selected fields by moving the chosen field up one position.
![]() Changes
the order of the selected fields by moving the chosen field down one position.
Changes
the order of the selected fields by moving the chosen field down one position.
How the selected fields appear on the generated Change Record Page is defined in
the database repository's Sticky Input HTML
field property. A snippet of HTML code is assigned to each field to determine how
the field will appear (textbox, text area, list box, drop-down, checkbox, password
field, etc.) Right-clicking
on a field name will open the Field Properties
dialog, where you can specify these properties.
Allow user to change key fields
By default, the file's key fields are created as output fields on the form instead of input fields, and are not processed by the LoadFormData subroutine. This prohibits the user from changing values of key fields. You can select the "allow user to change key fields" checkbox to have RPGsp treat key fields like all other fields. When this checkbox is selected, RPGsp generates the appropriate input boxes and LoadFormData code for key fields.
Required / needs validation checkmarks
On the Change Record field selection, each selected field has a checkbox by it. When checked, RPGsp will generate validation code for that field and place it in the Validate subroutine. The generated code makes the selected field a required field.
Use this option either for requiring field entry or for generating skeleton code that can be modified to create more elaborate validation logic.
If you selected the Create Page Now checkbox for the add action, you will be prompted with the Add Record Field Selection dialog.
Available Fields / Selected Fields
The Available Fields box shows you the file fields you can select for your Add Record Details Page. The box shows you the field name, the field description, the field length and type, and the key sequence for keyed fields.
The Selected Fields box shows the fields you have selected to display in your Add Record Details Page.
![]() Moves
a field or fields from the Available to the Selected Fields box. Prior to clicking
on this button, you should select one or more fields in the Available Fields box.
Moves
a field or fields from the Available to the Selected Fields box. Prior to clicking
on this button, you should select one or more fields in the Available Fields box.
![]() Moves all Available Fields to the Selected Fields box.
Moves all Available Fields to the Selected Fields box.
![]() Removes a field from the Selected Fields box.
Removes a field from the Selected Fields box.
![]() Removes all fields from the Selected Fields box.
Removes all fields from the Selected Fields box.
![]() Changes
the order of the selected fields by moving the chosen field up one position.
Changes
the order of the selected fields by moving the chosen field up one position.
![]() Changes
the order of the selected fields by moving the chosen field down one position.
Changes
the order of the selected fields by moving the chosen field down one position.
How the selected fields appear on the generated Add Record Page is defined in the
database repository's Sticky Input HTML
field property. A snippet of HTML code is assigned to each field to determine how
the field will appear (textbox, text area, list box, drop-down, checkbox, password
field, etc.) Right-clicking
on a field name will open the Field Properties
dialog, where you can specify these properties.
Required / needs validation checkmarks
On the Add Record field selection, each selected field has a checkbox by it. When checked, RPGsp will generate validation code for that field and place it in the Validate subroutine. The generated code makes the selected field a required field.
Use this option either for requiring field entry or for generating skeleton code that can be modified to create more elaborate validation logic.
Once you have filled out all the required information, the Next button will turn into a Finish button. Click Finish to start generating the selected page or pages. After the generation process is complete, you must compile each page before you can launch and test the application. If more than one page is created, RPGsp will automatically prompt you to compile.
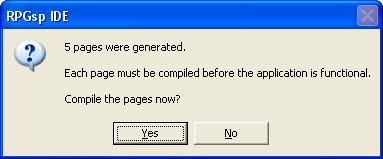
Click
Yes. Once the compilation is finished, click the launch icon (![]() )
to start the application.
)
to start the application.
Profound
Logic Software, Inc.
www.ProfoundLogic.com
(937) 439-7925